Real Food. Real Stories. Oh Yeah.

Posts tagged ‘tomato’

Panang Curry with Tofu and Vegetables

It’s never too hot for a good curry!

Panang Curry with Tofu and Vegetables

I really enjoy Thai food, especially a good Panang curry. My boyfriend also absolutely loves Thai; and we’ve gotten many a dinner together at the plethora of Thai places in the DMV area. While I enjoy these restaurants thoroughly, I wanted to try my hand at making my own curry at home. So, I decided to start with my favorite – a simple panang. I found this recipe for panang curry, and while it calls for chicken and fish oil, it seemed not only simple to prepare, but easy enough to modify into a vegetarian dish.

To start, I did some advance prep by cooking up some rice and making some coconut milk. As I mentioned last week, I’ve started making a lot of my own grocery store staples, such as bread and nondairy milk. In the book How it All Vegan, I found a really easy recipe for homemade coconut milk, and decided to give it a try. I am now a convert to homemade coconut milk! Basically, you take 1/2 a cup of shredded coconut (I used dry shredded, which I usually keep around the apartment for baking), add 1 cup of boiling water, blend them together until smooth, and then strain out the coconut bits. That’s it. Really. Why was I spending money on cans again?
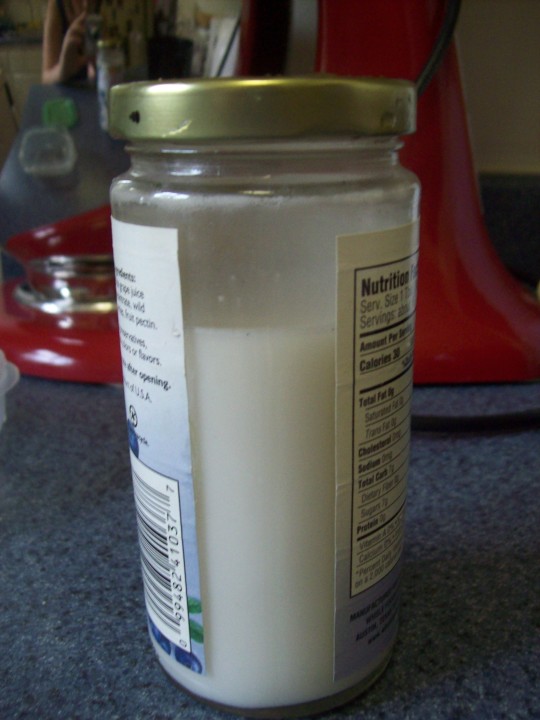
The recipe yields about 1 cup of coconut milk. If you measure it out and have less than one cup, add a little water

I kept both the coconut milk and the rice in the fridge until I made my curry that night (the coconut milk will separate when chilled; just shake it up before using).

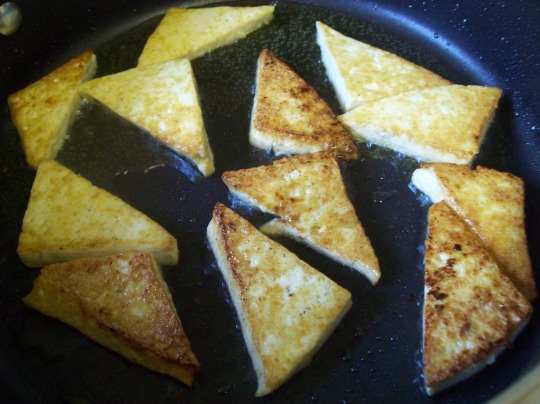
To start the curry, I first cut up half a block of tofu into small triangles, then fried them in olive oil for about 10 minutes; or the duration of time that it took to make the curry sauce. I’d recommend doing this in both a deep skillet and one with a lid, since the oil will fly up during frying and might hit you! I mostly left the tofu alone while making my curry sauce, with the exception of flipping the triangles over about halfway through. This allowed them to get really nice and crispy on both sides.

Fried triangles of goodness

Up next was the easy part – the sauce. I brought my coconut milk (though the recipe calls for a 14 oz can, I yielded plenty of sauce with the one cup I prepared) to a gentle boil, then added some garlic and red curry paste (as opposed to Panang curry paste), stirring to make a rich sauce. I then added some chopped onion, which I chopped finely as opposed to slicing into strips like the recipe suggests. While the onions simmered in the sauce, I prepped my other veggies and flipped the tofu triangles. After about three minutes, I added sugar, peanut butter (instead of roasted peanuts), sliced carrots, cubed tomato, and dried red pepper flakes (about 1/4 tsp), stirring to get the peanut butter good and incorporated into the sauce. Rather than add the tofu triangles to the sauce, as instructed, I drained the excess oil from my skillet, returned the tofu, and then added the sauce to the warm skillet, keeping the heat on low and allowing the curry to simmer. I’d recommend simmering for at least 5-10 minutes so that it can get nice and flavorful.
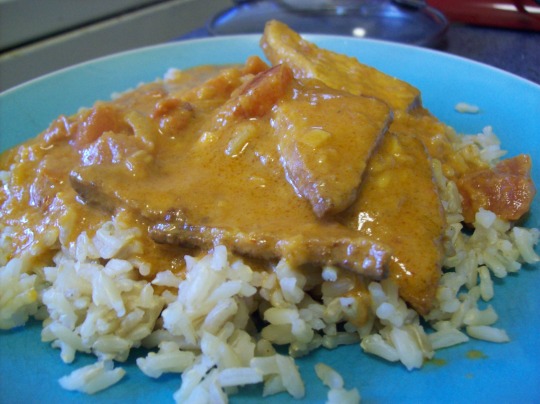

This recipe was relatively simple and cheap to prepare, two things I always like when it comes to homemade! Next time I want to add broccoli to the mix, as well as other vegetables. This curry was very delicious on a bed of brown rice. Definitely try making it at home, and save yourself a little money in the process! The recipe yielded about three servings, so you’ll even have leftovers.

Rolled Eggplant with Tofu Ricotta and Fast Homemade Tomato Sauce

Tired of plain old ravioli or lasagna? Try an eggplant roll-up instead!

Rolled Eggplant with Tofu Ricotta and Fast Homemade Tomato Sauce

Eggplant is a vegetable that has slowly grown on me, and a dish that helped the growing process was an Italian meal I had at a B&B in Charlottesville back in May. The dish consisted of thin slices of eggplant that were wrapped around a bundle of ricotta, then served on a bed of fettucini with sun-dried tomatoes. So when I was trying to think of a way to a) make myself a nice dinner, and b) use a small eggplant I’d purchased at the Farmers Market, I decided to try and make my own version of this dish, but without the pasta and without the cheese!

This recipe has four steps and is more involved than most of what I post, but it is definitely worth the time and effort. In all this took me about two hours to prepare (and I’m a slow prepper), from the ricotta to the sauce to the eggplant to the whole kit ‘n caboodle. If you’ve got some time in the evening, definitely use it to make this dish!

The first thing I made was the tomato sauce. Using the basic idea behind my ridiculously easy tomato basil sauce, I blended together half of a fresh tomato, a slice of onion, and two crushed cloves of garlic. You’ll want to blend until the ingredients are smooth, unless you like really chunky sauce on lasagna-esque dishes. I then transferred the sauce to a small saucepan and heated it over medium, adding tomato paste, salt, and pepper to it to deepen both the flavor and the color. I let this simmer while I made my tofu ricotta, which gave it about ten minutes; but you can let it simmer longer if you like! This will yield about one cup of sauce.

I then made my tofu ricotta, which was equally fast and easy. I simply blended some extra firm tofu, almond milk, lemon juice, nutritional yeast, garlic, salt, and dried oregano in a blender until the mixture was creamy and smooth. I then placed it in a bowl and let it chill in the fridge until it was ready for my roll-ups. Just a note, this ricotta is flavored heavily with garlic and oregano, so it’s really only suitable for pasta dishes and the like (as opposed to an all-purpose ricotta sub).

This ricotta can also be used in vegan stuffed shells, or doubled to make a vegan lasagna

Now, the eggplant! I used a small eggplant that was about six inches tall and as wide around as a small jelly jar lid. You can make this with a large eggplant, but you may want to cut it in half first before cutting your eggplant strips. Since my eggplant was smaller, I simply cut off the top stem, then sliced vertically into thin, long strips, like the one pictured below.

I then placed each strip on a baking sheet and baked them for eight minutes at 425 F, a time and temperature I got from Appetite for Reduction‘s Eggplant Bacon recipe. After eight minutes I tested for “doneness” by pushing up on each strip with a spatula. If it folded over easily, I put it on a plate; if it was still firm, I flipped it over and baked for three minutes more. The goal is to bake and dehydrate the eggplant strips enough so that they can be easily rolled.

Examples of "done" eggplant strips

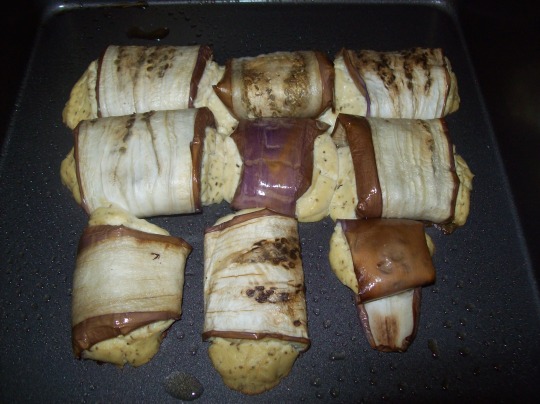
Now comes the fun part. To make my eggplant rolls, I first took a strip of eggplant and laid it flat on a plate. I then placed a dollop of tofu ricotta a little ways from one end of the strip, as pictured below. I then folded up the end with less length over the ricotta, then folded the longer end overtop to create a roll-up, sort of like rolling a sleeping bag or wrapping a present. I then placed the roll-up with the two ends down on the pan, so that the roll would stay closed while baking.

Simply repeat this until no eggplant remains (you may have some extra ricotta, which is fine), placing your roll-ups in rows in a baking dish. I then baked the rolls as-is for twenty minutes to cook the eggplant further and get the ricotta nice and hot.

Rolled Eggplant, Round 1

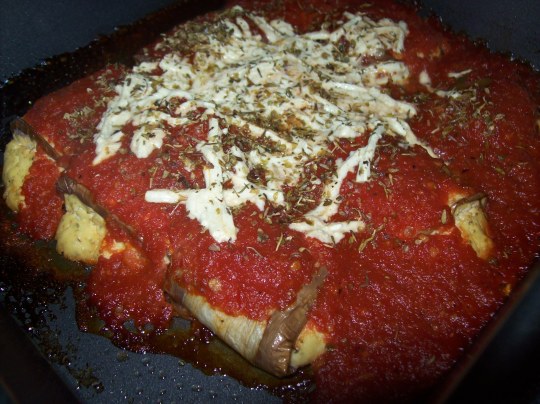
I then covered my baked eggplant rolls with the tomato sauce, and also added some vegan mozzarella cheese (this is entirely optional; I just had some extra from a vegan pizza I made awhile ago) and more dried oregano (also optional but I recommend this more than the vegan cheese) on top. I baked for twenty more minutes, and then at last, it was done!

Rolled Eggplant, Round 2!

This dish is great when you’re looking for a filling Italian dish that’s not loaded with starchy noodles, and also convenient to serve since it’s already prepared as bite-size pieces (so you don’t have to slice it like a lasagna). You can either serve them alone or atop a bed of pasta. It’s got quite a few steps involved but it’s worth it in the end!

Rolled Eggplant with Tofu Ricotta and Fast Homemade Tomato Sauce (Serves 2 or more)

Fast Homemade Tomato Sauce:

½ large tomato or one medium tomato

1 1/4-inch slice yellow onion

2 cloves garlic, crushed

2 TB tomato paste

Salt and pepper, to taste

Blend the tomato, onion, and garlic in a blender or food processor until smooth. Pour into a small saucepan and heat on medium. Add tomato paste, salt, and pepper, and stir until combined. Once sauce begins to boil, reduce heat to low and simmer for at least ten minutes, until sauce is smooth and a deeper shade of red. Store at room temperature until ready to use. Makes approximately one cup.

Tofu Ricotta:

½ of a 14 oz block extra firm tofu, patted dry (do not press)

1 TB lemon juice

2 TB nondairy milk

2 TB nutritional yeast

1-2 cloves garlic, crushed

1 tsp salt

1-2 tsp dried oregano

Blend all ingredients in a blender until smooth. Chill until ready to use.

Eggplant Rolls:

1 small eggplant (or a large eggplant cut in half across the middle before slicing into strips)

Cooking oil/cooking spray

Salt (to taste)

Preheat oven to 425 F and spray a baking sheet with cooking oil. Cut the eggplant into long, thin strips. Place eggplant on baking sheet and spray the tops with more oil; season with salt. Bake for eight minutes. Check the eggplant – if a piece folds easily with a spatula, then transfer it to a plate until ready to roll. Otherwise flip and bake for three minutes more.

Reduce heat to 350 F and spray a baking dish with cooking spray. Take a piece of eggplant, add a tablespoon (or so) of ricotta between the center of the strip and one end. Fold the shorter end over the ricotta, then fold the longer end overtop to create your roll. Place the eggplant roll in the baking dish with the ends down, so the roll is held shut. Repeat until no eggplant remains.

Bake for 20 minutes. Remove from oven, then cover with all of the tomato sauce. Top with vegan cheese and/or dried oregano if desired. Bake for 20 minutes more. Serve immediately.

Adventures in Urban Gardening: The Tote Bag Garden

As I’ve discussed before, having a garden is a small dream of mine. I’d love to have a small backyard with a modest plot to grow greens, tomatoes, winter squashes, and the like for my culinary use. But living in an apartment (that doesn’t have a shared gardening space) can make this difficult. So far I’ve managed to keep Marvin the living basil plant alive for about three weeks. He’s grown taller and is still growing leaves, which makes him the most successful produce I’ve ever maintained on my own. Which makes me wonder, what else can I grow inside an apartment?

Enter the tote bag garden!

I got the idea specifically from this month’s Birds and Blooms, which suggested creating a portable garden by planting seeds within reusable tote bags. The light bulb sparked and refused to go off. Tote bags are cheap, big, and don’t take up a lot of space – why couldn’t I grow produce? And furthermore, why hadn’t I thought of this before?

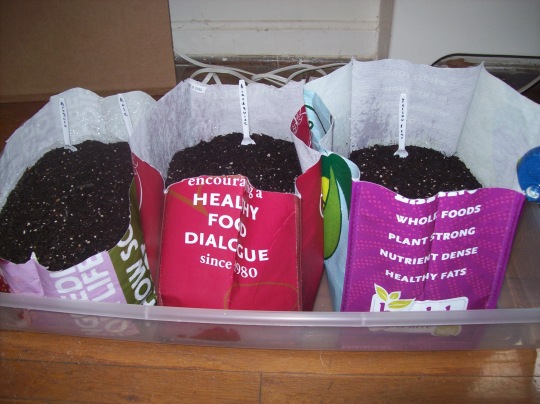
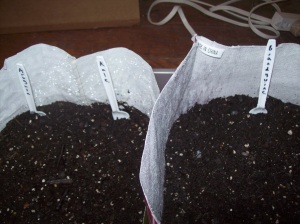
So after deliberating about it for awhile (all of a week), I bought some seeds, reusable totes (made from recycled plastic), potting soil, a big plastic tub to hold the bags, and a watering can. In sum I paid about $43 for everything, including the watering can and the plastic tub; so your own costs may be less if you already have these materials available. The dirt only came to about halfway up the bag, so I cut off the tops for easy watering and maintenance. In lieu of proper garden markers from labels or popsicle sticks, I labeled my produce with some plastic forks I had lying around. Recycling!

I then planted my seeds: two different greens, kale and arugula, in one bag; brandywine tomatoes in another, and yellow pear tomatoes in the third. They’re hanging out in front of my window now in the living room, in the apartment below Marvin, if you will.

I am hoping this turns out at least moderately successful because it’d be a great and convenient way to grow produce that I tend to go through quickly and thus spend a lot of money on. I will of course be tracking my plants’ progress on the blog, so stay tuned! And hopefully I’ll have some recipes featuring homegrown tomatoes and greens later this summer!

Wheatberry and Dandelion Green Salad with Pesto

Mmm, healthy salads (and no, that’s not always redundant – just ask any chain restaurant)!

Wheatberry and Dandelion Green Salad with Pesto

Earlier this week I sang the praises of wheatberries, and suggested adding them to a salad. I followed my own advice and made them one of the staple bases of this filling lunchtime salad, along with some dandelion greens!

Dandelion greens are new to me in terms of food. I’ve heard health food types sing their praises for the past few years, but I’ve never picked them up for my own use until now. Whole Foods had some nice bunches for sale, and one of my goals each week is to never get the same leafy greens twice in a row, with an extra incentive to try and get greens I don’t normally buy. Dandelion greens fit this bill, and I’m excited to try them in some new dishes, especially since they supposedly do amazing things for your health* (the website claims that dandelion greens could, among other things, improve liver function, cleanse and purify both the skin and blood, and help treat various illnesses), and are a natural source of loads of vitamins and minerals including vitamin A, iron, potassium, fiber, and more. Huzzah!

Who can resist such beautiful greens?

But the million dollar question – how do dandelion greens taste? I ate these greens straight up and raw in the salad (save for a pesto dressing) and the first thing I noticed was that they were very bitter. Now, this isn’t necessarily a bad thing, but it’s a flavor to note – if you’re not a fan of bitter greens, then you may want to cook the dandelion greens a bit or perhaps swap out another green for this salad (I would recommend arugula on the stem, or kale). Have you ever eaten celery leaves? It’s a similar bitter flavor, but not quite as zippy. It’s kind of hard to explain. I, however, didn’t mind once I processed the flavor, and actually really enjoyed the way it paired with tangy tomato, sweeter asparagus, and neutral wheatberries, not to mention the pesto (I also love celery leaves, for the record).

This salad is very dense thanks to all the fiber, not to mention a good share of protein coming from the wheatberries and veggies. I used a pre-made pesto sauce, so no recipe for that (today) – use your favorite! I think the pesto adds a nice zip to all of the vegetables and especially the wheatberries, but you can use another dressing if you like.

Wheatberry and Dandelion Green Salad with Pesto (serves 1)

1 1/2 to 2 cups chopped dandelion greens

1/2 cup prepared wheatberries

1/2 of a medium tomato, sliced

3 stalks of asparagus, chopped

1-2 TB prepared pesto sauce

Toss all ingredients in a bowl until the pesto covers all of the ingredients evenly. Serve immediately.

*Just a note that I’m not a doctor and am not claiming that dandelion greens *do* perform health miracles, but rather *may.* Always consult a professional for advice on herbal medicine (or any sort of medicine) – certainly don’t consult a food blog!

Once More on the Go: Sticky Fingers Bakery

“Once More on the Go” will henceforth signal a restaurant review or dining out experience (unless I change my mind later on). I’ve been trying to make more meals at home, but sometimes you just want to go out and have something prepared for you – nothing wrong with that! Being a vegetarian on the go can be a bit more difficult, especially if you want more than just mac-and-cheese, a baked potato, or a side “salad” (because apparently iceberg lettuce and one wedge of tomato counts as a salad to some places). So while all I can offer are my own opinions, I do want to share my dining experiences with others so you can get an idea of where to go – and what to avoid!

First up is a place that everyone must go to at least once – Sticky Fingers Sweets and Eats.

The T.L.T. (tempeh-lettuce-tomato) on multigrain bread

Oh, Sticky Fingers, how I love thee. I don’t live in Columbia Heights but if I did I would basically live at this cafe and bakery. Their whole menu is vegan and includes sandwiches, hot dogs, an assortment of baked treats, and even vegan soft serve! It’s perfect if you’re looking for a simple sandwich, cup of coffee, or baked treat without having to worry about animal products of any kind.

While the fare here can be a bit more processed than this blog focuses on, it does feature opportunities for healthier eating if you so choose. When I’ve gone in the past I’ve usually gotten a hot sandwich such as their amazing vegan tuna melt, which is made with soy tuna, vegan cheese, vegan mayo, and if you wish, added tempeh. Mmmmm. But it’s not too filled with veggies, and it relies a lot on mock subs, which translates into a whole lot of processing! So it’s not something I want to eat everyday.

On my last visit, I decided to meet fresh vs. processed halfway with the T.L.T. – a tempeh, lettuce, and tomato sandwich with vegan mayo on multigrain bread.

T.L.T.

I really liked that this sandwich was piled high with dark leafy greens and tomatoes with just one layer of smoked tempeh (aka tempeh bacon), so it gave the fresh vegetables a chance to stand out. The serving of vegan mayo was generous but not overboard, which was nice. Plus, you can’t beat bread with sunflower seeds on the crust! If I would’ve changed anything, I would’ve toasted the bread, because that’s how I always ate BLT’s growing up. However, this sandwich was very tasty and filling as is, and didn’t weigh-lay me the way that other, meltier options sometimes do (but oh, is it worth it).

I also had a delicious dirty chai (chai with one shot of espresso added) with my sandwich, which was brewed to perfection. The foam didn’t make me gag, for a change; and the drink had a nice flavor without being sickeningly sweet like other chai lattes. Plus, it came with a heart design in the foam – what’s not to love?

A dirty chai is also known as a red eye chai, and is a great pick-me-up!

In short, if you haven’t been to Sticky Fingers yet, you must go. Vegan or no, the food is delicious and (can be) reasonably healthy and fresh!

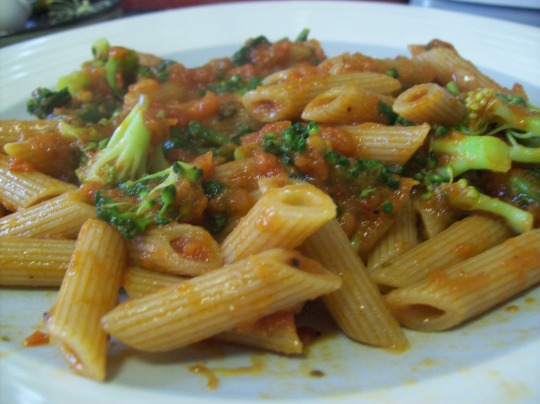
Penne, Broccoli, and Arugula with Ridiculously Easy Tomato Basil Sauce

Mm, pasta.

Penne, Broccoli, and Arugula w/ Tomato Basil Sauce

I love a good pasta meal for lunch or dinner, but especially lunch, since the carbs give me a great mid-day boost. I also love loading the pasta dish with veggies, so I can bulk it up without meats or mocks. Plus, the veggies give the dish such a nice color!

But the make-or-break, of course, is the sauce. I love me some fresh sauce, but a lot of recipes can be complicated or require a ton of simmering time. Enter Ridiculously Easy Tomato Basil Sauce! This sauce is fast, easy to make, and largely fresh. What’s not to love?

Mm, sauce.

I started by using a whole tomato, some fresh basil, and a smidge of onion – as in, I chopped off about 1 1/4-inch slice. I would’ve used whole garlic cloves as well, but I’d used the rest of my garlic to make Golden Pizza Hummus, so I made due with garlic powder. I pulsed these ingredients in a blender, then transferred them to a sauce pan, where I added tomato paste (adds more flavor and makes for a deeper red), olive oil, and salt/pepper. I simmered the sauce while I made the pasta, and all were done in record time!

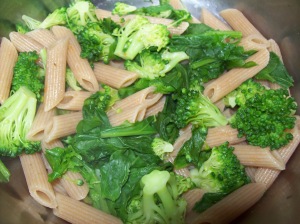
As for the pasta, I boiled some whole wheat penne for about six minutes, which made it al dente, just the way I like it. I also added broccoli and fresh arugula which was still on the stem. I chopped the arugula until I got to nothing but stems, then discarded the remaining stems; but you can add them if you want. I like to add the veggies to the boiling pasta about one minute before the pasta’s scheduled to be done, so that the veggies can cook a bit without getting too mushy. Then you just drain the pasta and veggies, return to the pot, then toss with your freshly-made sauce. Presto! A fresh pasta dish made with fresh sauce, all within 30 minutes.

Penne, Broccoli, and Arugula with Ridiculously Easy Tomato Basil Sauce (serves 1)

Sauce:

1 small-medium tomato, quartered

1/4 cup fresh basil leaves

A slice or two of one yellow onion, quartered

1-2 cloves of garlic OR 1/2 to 1 tsp garlic powder

2 TB tomato paste

1 TB olive oil (optional but recommended)

Salt and pepper, to taste.

Place the fresh tomato, basil, onion, and garlic in a blender and pulse until pretty smooth, but not completely pureed (unless you don’t like chunky sauce). I highly recommend pulsing instead of straight-up blending, as this allows for greater control of the texture.

Transfer to a small sauce pan and add tomato paste. This will deepen the red color, so don’t worry when you initially pour out the blended ingredients and they look pink and bland. 🙂 Stir and heat over medium heat. Simmer for a few minutes over medium, making sure the sauce is good and bubbly, and the red color has a chance to really deepen. Add the olive oil and seasonings, then reduce the heat to low, simmering for at least five minutes more.

While the sauce cooks, make your pasta.

Pasta:

2/3 cup dry whole wheat penne

1/2 cup broccoli florets

1 cup chopped fresh arugula

Bring water to a boil in a medium saucepan, then add the penne. Cook for six minutes, adding the broccoli and arugula after five minutes. Drain completely, then return to the pot. Toss with tomato basil sauce, then serve.